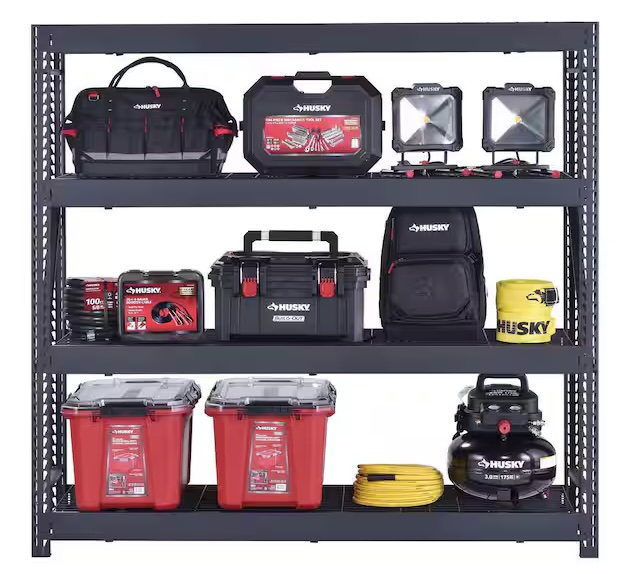
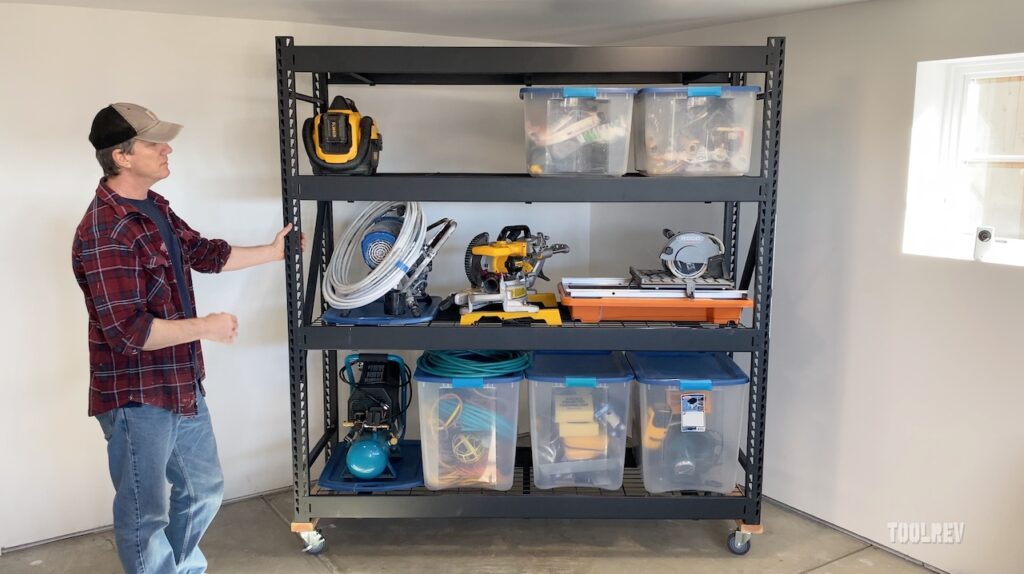
Are you searching for heavy-duty steel shelving to organize your garage, basement, or storage space? The Husky Industrial Duty Steel Shelving from Home Depot is a top contender, boasting a massive 10,000 lbs. total capacity and versatile, adjustable shelves.
Check out our video and the review that follows covering key features, assembly, casters, pricing, alternatives, and real user feedback. Whether you need home or commercial storage, this guide will help you decide if Husky shelving is right for you.
ToolRev earns commissions on purchases made through our links.
Husky Industrial Duty Steel Shelving – Multiple Sizes
Key Features and Specifications (4-Shelf Model)
- Dimensions: 77 in. W x 78 in. H x 24 in. D (adjustable to fit your space)
- Capacity: Up to 10,000 lbs. total (2,500 lbs. per shelf when evenly distributed); reduces to 1,000 lbs. with casters
- Material: Heavy-duty welded steel with powder-coated finish for rust resistance
- Shelves: 4 adjustable wire decks for customizable height and easy cleaning
- Assembly: Tool-free design; assembles in under an hour
- Warranty: Husky Lifetime Warranty
- Additional Perks: Dual-slotted uprights for daisy-chaining multiple units; compatible with casters for mobility
This shelving unit excels in garages, workshops, warehouses, or even home pantries, handling everything from tools and paint cans to bulk supplies. Its industrial design ensures durability, making it a long-term investment for organization.
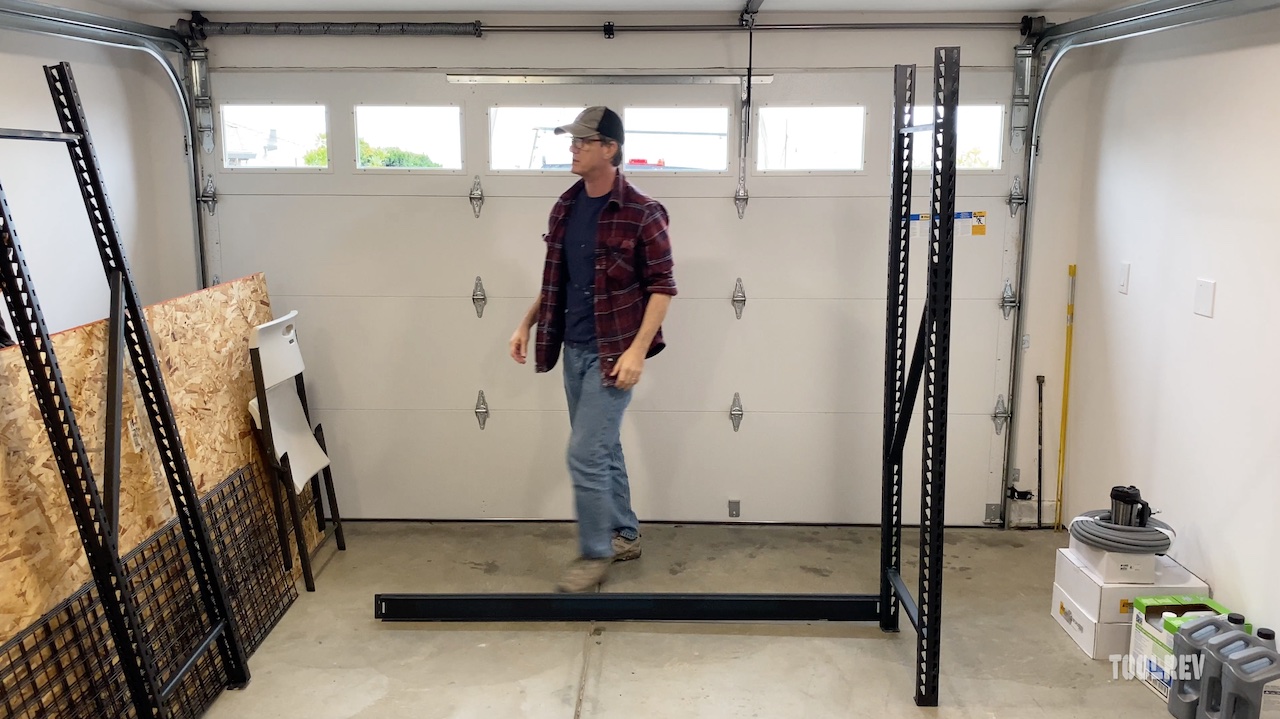
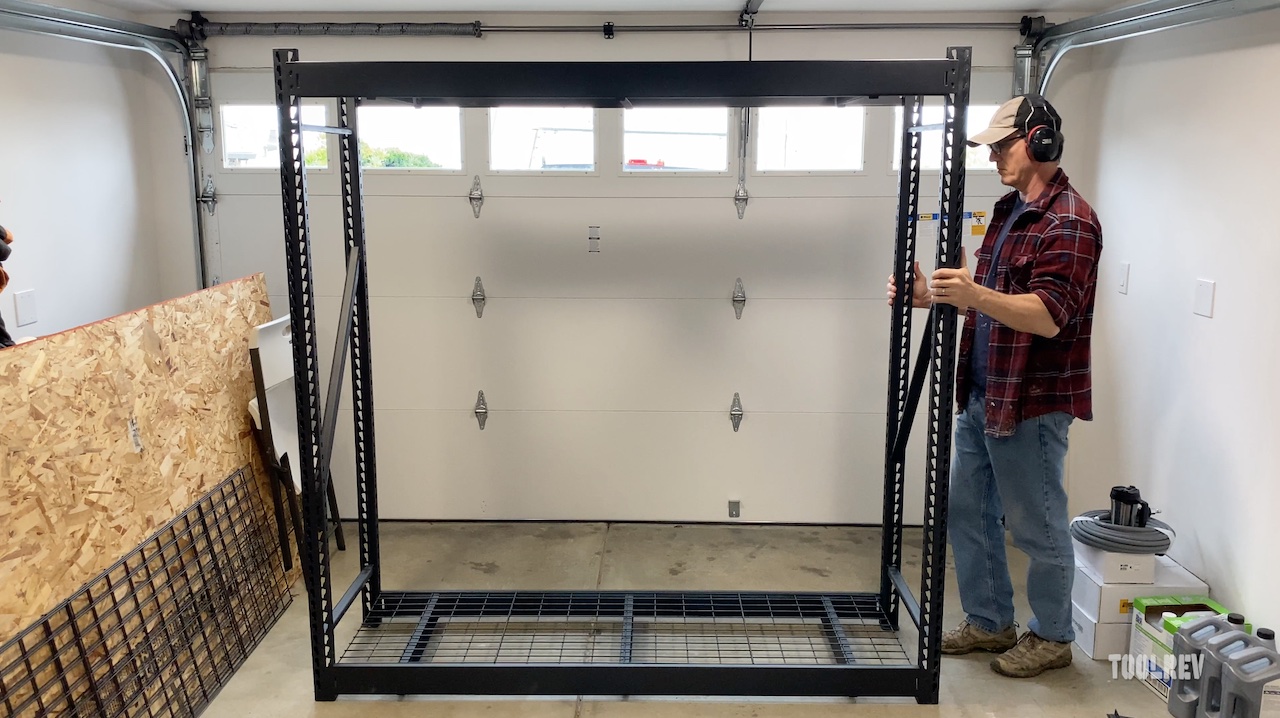
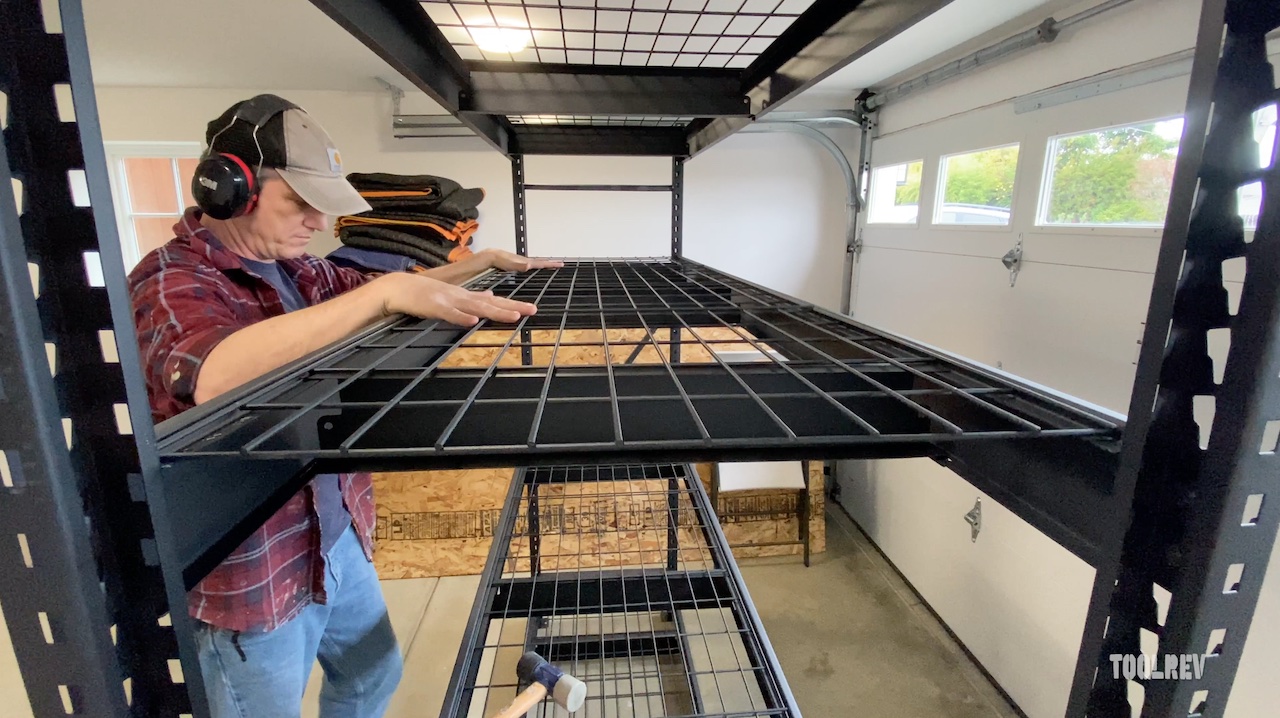
Assembly Guide: Quick and Tool-Free Setup
One of the standout features of the Husky shelving unit is its hassle-free assembly. No tools are required, though a rubber mallet can help secure parts, and hearing protection is recommended for safety.
- Slide the shelf rails into the riser slots on the uprights.
- Snap in the cross supports for stability.
- Drop the wire racks onto the supports—ensure rails are oriented front-to-back for smooth sliding of items.
Tip: Avoid my mistake—don’t install the racks upside down! You want the rack rails that run front to back face-up to aid sliding things on and off of the shelf.
Customization: Adding Casters for Mobile Storage
Transform your stationary Husky unit into a rolling powerhouse by adding casters. This mod reduces capacity to 1,000 lbs. but adds incredible versatility for garages or workshops. I’ve used mine for years with no issues, even fully loaded.
Important Disclaimer: Proceed at your own risk—this hasn’t been officially tested by Husky. That said, it’s held up perfectly in my experience.
Materials for Caster Installation
- Two 2-foot-long 2×4 lumber pieces (for 24-inch depth units)
- 4 x 3/8″ x 3″ lag bolts
- 4 x 4″ Everbilt swivel plate casters (2 locking, 2 regular; 250 lbs. each)
- 4 washers and 4 nuts (for 3/8″ bolts)
- 16 x 1/4″ x 1-1/4″ lag screws
Tools Required
- Drill
- 3/8″ spade bit
- 5/8″ spade bit (for counterboring)
- 3/32″ twist drill bit (for pilot holes)
- Marker, wrench/socket set, screwdriver or driver bit
Step-by-Step Caster Installation
- Prepare Bases: Cut 2x4s to 2 feet each.
- Mark Holes: Trace shelf feet mounting holes onto 2x4s.
- Drill Through-Holes: Use 3/8″ spade bit for bolt passages.
- Counterbore: Create recesses for bolt heads with 5/8″ bit.
- Insert Bolts: Place lag bolts from the bottom.
- Predrill for Casters: Mark and drill pilot holes with 3/32″ bit.
- Attach Casters: Secure with 1/4″ lag screws.
- Mount to Shelf: Align, insert bolts, add washers/nuts, and tighten.
- Test: Roll on flat surface, check locks, and load gradually.
Notes: Use locking casters for stability. Total time: 1-2 hours. Adjust for different depths if needed.
This setup adds mobility, making it ideal for garages, workshops, or storage spaces. If your shelf dimensions differ, adjust the 2×4 lengths accordingly. Always prioritize safety—don’t exceed the casters’ or shelf’s weight limits. Good luck!
Cost and Value: Is It Worth It?
I paid $299 for my Husky in 2022, $80 for the casters, $15 for fasteners and a 2×4, $30 sheet of 1/2″ plywood, which I eventually used to replace the wire shelves. All in with tax we’re getting near $500. Worth it? For me, YES!
As of November 2025, the Husky 4-Tier unit is available at Home Depot for around $199 (down from $219). That’s a steal compared to my original $299 purchase in 2022 or the $250 I spotted in 2023.
You can build your own wooden version for about $220 (18 2x4s, 1 1/2″ plywood sheet, fasteners, plus $100 casters (or cheaper casters).
Cheaper caster options: Husky 4″ casters or Snap-Loc 4″ casters.
Pros and Cons Based on User Reviews
Drawing from our hands-on experience and Home Depot review ratings of (4.5/5 from thousands of reviews):
Pros
- Extremely sturdy and overbuilt for heavy loads
- Easy, quick assembly (often under 1 hour)
- Adjustable and expandable design
- Lifetime warranty and rust-resistant
- Great value, especially on sale
Cons
- Heavy (150 lbs.), may require two people for setup/moving (I did it all myself)
- Wire shelves may need plywood for small items
- Occasional quality control issues (e.g., dents from shipping)
- Capacity drops with casters
2025 Update: Still Going Strong
Update (January 8, 2025): I’ve relocated this unit and upgraded the wire racks to 1/2″ plywood (avoid OSB for odor). It looks sharper, rolls smoothly even loaded, and remains a garage staple. Questions? Drop them in the comments!
Bottom Line: Why Choose Husky?
The Husky Industrial Duty Steel Shelving Unit combines strength, ease, and affordability, outshining wooden alternatives in adjustability and aesthetics. With a lifetime warranty and proven durability, it’s ideal for anyone serious about garage organization. Highly recommended—grab yours today.
Comparisons: Husky vs. Alternatives
| Feature | Husky 4-Tier | Gorilla Rack (Costco) | Gladiator | DIY Wood |
|---|---|---|---|---|
| Price | $199 | $299 | $300+ | $250 |
| Capacity | 10,000 lbs. | 8,000 lbs. | 8,000 lbs. | Variable |
| Assembly | Tool-free | Easy | Moderate | Tools needed |
| Durability | High | High | High | Medium |
| Reviews | 4.5/5 | 4.4/5 | 4.6/5 | N/A |
FAQ: Common Questions About Husky Garage Shelving
How much weight can the Husky 4-Tier hold?
Up to 10,000 lbs. total (2,500 lbs. per shelf), but 1,000 lbs. with casters.
Is assembly really tool-free?
Yes, though a mallet helps. Most users assemble in under an hour.
Can I add more shelves?
It’s 4-tier standard, but uprights allow expansion or daisy-chaining units.
What’s the best alternative?
For similar strength, try Gorilla or Gladiator; for budget, DIY wood.


Hey Alex,
Looking to add casters to our shelving and saw your helpful video. Did your casters have a threaded top bolt that you fed through the 2×4 and through the hole in the shelving foot to secure? Or did you drill a hole through the 2×4 for a separate bolt, but cut out the lower side of the 2×4 around the bolt hole so the bolt head and washer could sit inset and flush, for a flat plate caster to be screwed onto?
Hi Chris
I used a separate bolt. You can see it in this YouTube short https://youtube.com/shorts/tpsHxmq0idA?feature=share. I’ve also added 1/2 plywood, not stinky OSB, and it looks really great with the plywood shelves in place of the wire. I recommend 4″ casters.
Excellent! Many thanks for the confirmation of how you adapted these shelves for casters.
video not available anymore….
short not there anymore can you please reupload??
https://youtube.com/shorts/N1eWCpckk9Y?feature=shared
Chris- why did you use the 2×4 at all? Why not just use a caster with a stem bolt and go through the bottom of the shelf legs? Thanks.
for more support
What are the sizes of the screws and the lag bolt and nuts that were used
Putting together a list. Check this article tomorrow for that info.