Installing a garbage disposal can be a straightforward DIY project that enhances your kitchen’s functionality. Whether you’re replacing an old unit or adding one for the first time, this guide will walk you through the process step by step. With the right tools and a bit of patience, you’ll have your new garbage disposal up and running in no time. Here’s how to do it.
How to replace a garbage disposal:
- Turn off the power: Locate your kitchen’s circuit breaker and switch off the power to the disposal’s electrical circuit.
- Shut off the water supply: Turn off the water valve under the sink to avoid any leaks during installation.
- Read the manual: Every garbage disposal comes with a manufacturer’s manual. Review it for model-specific instructions.
Tools and Materials Needed
- Garbage disposal unit
- Screwdriver (flathead and Phillips)
- Plumber’s putty
- Pipe wrench or adjustable wrench
- Hacksaw (if trimming pipes is needed)
- Electrical tape
- Wire nuts (if attaching electric cord to unit)
- Bucket
- Towels or rags
- Safety gloves and glasses
Step-by-Step Installation Process
Step 1: Remove the Old Garbage Disposal (If Applicable)
- Disconnect the power: If replacing an old unit, unplug it from the outlet under the sink or disconnect the wires at the electrical box.
- Detach the drain pipes: Place a bucket under the sink to catch water. Use a pipe wrench to loosen the nuts connecting the disposal to the drain pipe and dishwasher hose (if present). Remove the pipes.
- Remove the disposal: Loosen the mounting ring by turning it counterclockwise with a screwdriver or wrench. Carefully lower the old disposal and set it aside.
Step 2: Prepare the Sink Flange
- Disassemble the mounting assembly: Your new disposal will include a sink flange, rubber gasket, and mounting ring. Take these apart.
- Apply plumber’s putty: Roll a 1/2-inch thick rope of plumber’s putty and wrap it around the underside of the sink flange.
- Install the flange: Insert the flange into the sink drain opening from above. Press down firmly to seat it in the putty.
- Secure from below: Under the sink, slide the rubber gasket and mounting ring onto the flange. Tighten the mounting screws until the flange is snug and excess putty squeezes out. Wipe away the excess putty.
Step 3: Connect the Electrical Wiring (If already connected skip to step 4)
- Check the power: Ensure the circuit breaker is still off for safety.
- Access the wiring: Remove the cover plate on the bottom of the new disposal to expose the wiring compartment.
- Connect the wires: Match the wires from the disposal to the house wiring (typically black to black for hot, white to white for neutral, and green or bare to ground). Secure each connection with wire nuts and wrap with electrical tape.
- Replace the cover: Once wired, reattach the cover plate.
Step 4: Mount the Garbage Disposal
- Align the disposal: Lift the disposal and align its mounting tabs with the mounting ring under the sink.
- Secure it: Twist the disposal clockwise until it locks into place. It should feel firm and stable.
- Check alignment: Ensure the disposal’s discharge tube lines up with your drain pipe.
Step 5: Connect the Plumbing
- Attach the discharge tube: Connect the disposal’s discharge tube to your drain pipe. Use a gasket and nut to secure it tightly. If the pipe is too long, trim it with a hacksaw.
- Connect the dishwasher (if applicable): If you have a dishwasher, attach its drain hose to the disposal’s dishwasher inlet. Secure it with a hose clamp.
- Tighten all connections: Use a wrench to ensure all plumbing connections are leak-free.
Step 6: Test the Installation
- Turn on the water: Restore the water supply and check for leaks at all connections.
- Restore power: Turn the circuit breaker back on and plug in the disposal (or test the hardwired connection).
- Run a test: Turn on the disposal and run water through it. Listen for unusual noises and double-check for leaks.
Tips for Success
- Avoid over-tightening: This can damage gaskets or crack pipes.
- Use the right size unit: Ensure your garbage disposal matches your household needs (e.g., 1/2 HP for small homes, 1 HP for larger ones).
Conclusion
Installing a garbage disposal is a rewarding project that can save you time on kitchen cleanup. By following these steps, you’ll have a fully functional unit ready to tackle food scraps. Happy installing!
ToolRev earns commissions on purchases made through our links.
Here the disposal is plugged into a switched wall outlet. If your outlet is not connected to a wall switch you can use a disposal switch such as this Danco Air Switch.
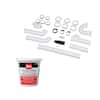
Oatey 1-1/2 in. White Plastic Slip-Joint Garbage Disposal Install Kit with 14 oz. Plumber’s Putty
