Replacing concrete driveways, patios, and more can get expensive fast. In many cases, learning how to resurface concrete is a smarter option, saving thousands over full replacement. In this guide, I’ll share how I used Ardex CD to resurface my steps and retaining walls. It’s physical work but basic—perfect For DIY projects where costs are rising.
Why Resurface Concrete
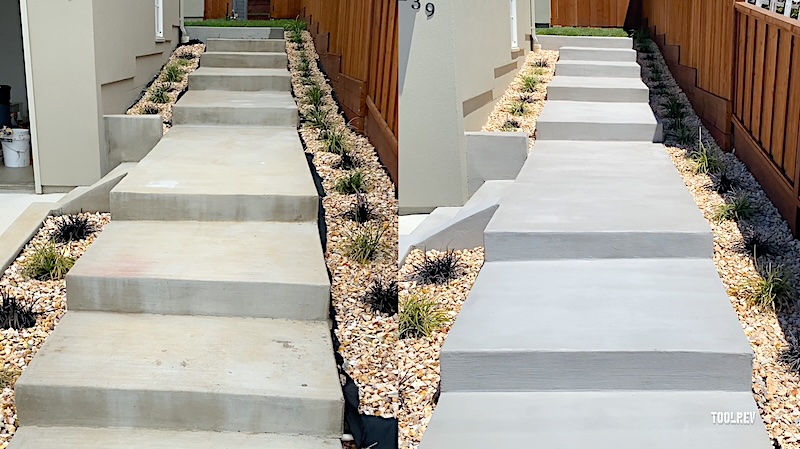
Resurfacing saves you thousands compared to tearing out and replacing concrete, and you can do it yourself in a weekend. It fills cracks, pits, and imperfections, creating a fresh, durable surface for foot or vehicle traffic. From my experience, it’s ideal for steps or patios in coastal weather holding up to foot traffic and pressure washes.
What is Concrete Resurfacer
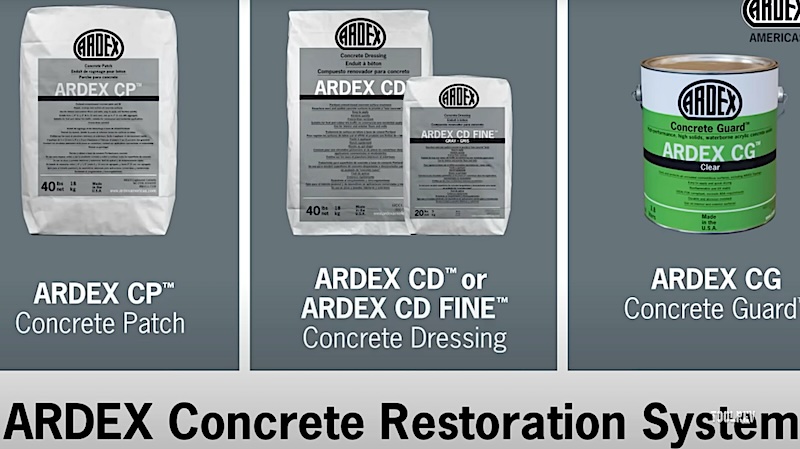
Concrete resurfacer is a cement-based compound, often modified with polymers for enhanced bonding and durability, designed to repair and renew worn or damaged concrete surfaces by applying a thin overlay. Most brands offer a three-part system: a concrete patch for up to 2-inch repairs, the dressing for up to 1/2-inch gouges, and a sealer to finish.
Ardex CD
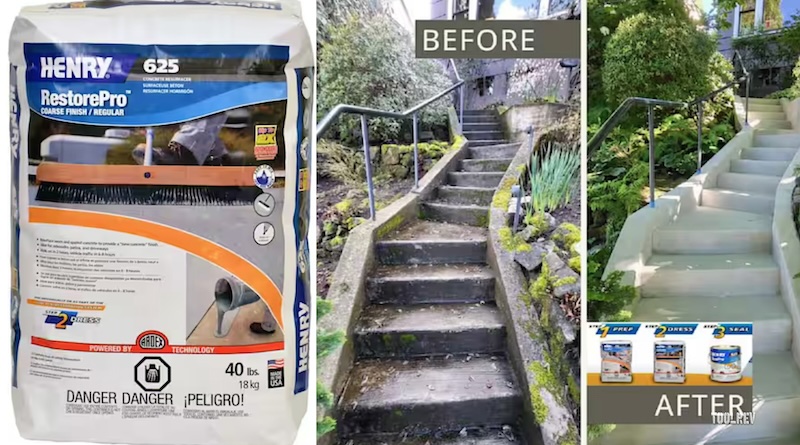
For my project I went with Ardex CD Fine Finish in gray. It also comes regular finish. It’s a premium dressing I bought at White Cap building supply for $55 per 20 lb bag (40-pound bags are available too). Home Depot carries Henry 625 RestorePro, which Ardex confirmed to me is nearly identical since they own Henry.
Application Overview
Whatever brand of concrete resurfacer you go with, they all apply pretty much the same way: You mix it with water, it has a 30-minute pot life, you can trowel or squeegee it onto the surface, and then, depending on the weather, you have 5 to 15 minutes to work it in and apply a broom or whatever finish you like.
What You’ll Need for Concrete Resurfacing
- Concrete resurfacer: Ardex CD, Henry 625 RestorePro, etc.
- Mixing tools: Drill with a mixing paddle and a bucket.
- Application tools: Metal trowel or rubber squeegee, plus a broom for texture.
- Pressure washer: I used a 3300 PSI model.
- Cleaning supplies: A bin of water for the broom and a 5-gallon bucket for brushes.
- Optional: Concrete patch for deeper repairs, caulk for cracks, and a sealer. (I skipped the sealer)
Application
Step1: Prep the Concrete Surface
A clean, absorbent surface is key for adhesion. I used a 3300 PSI pressure washer to blast away dirt and loose concrete, but really, if water absorbs into your concrete fairly quickly, the dressing will probably adhere to it.
Say No to Crack
Ardex suggests pretreating cracks with Ardifix and a sand broadcast. I originally used non-textured SikaFlex silicone to seal the cracks at the base of me steps before realizing the dressing probably wouldn’t stick to it and scraping most of it back off with a wire brush.
That said, what was left in the cracks probably helped because most weren’t visible a year later.
THAT said, any untreated cracks covered by the dressing returned within weeks.
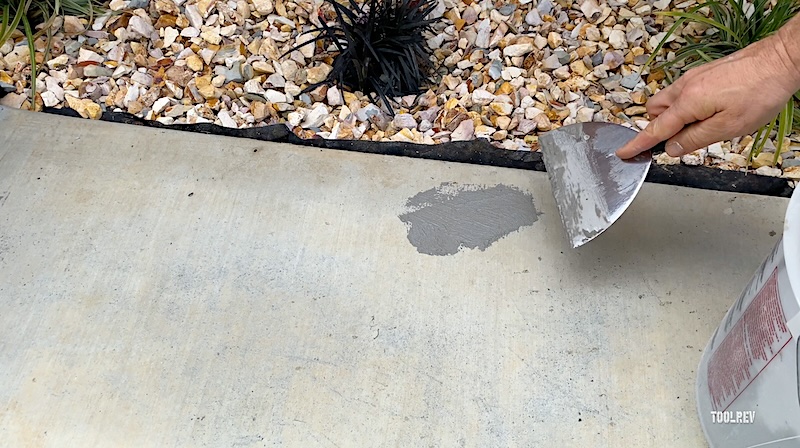
Small surface gouges up to 1/2″
Some brands call for pre-filling minor surface gouges before applying the finish coat. I did this, using the Ardex dressing, and all the patches flashed through the single finish coat I did. Next time, I’ll try letting the main coat fill in the small gouges.
Ardex says their regular-finish resurfacer covers better than the fine, and you can apply multiple coats, waiting a day between. I stuck with one coat for a more natural “real concrete” look. I think the more solid and even the finish, the more it may look like paint.
Step 2: Mix the Concrete Resurfacer
Follow the package for water-to-powder ratios, mixing to a smooth consistency. Add the water to the bucket before the powder. Mix with a 1/2″ or larger drill and mixing paddle.
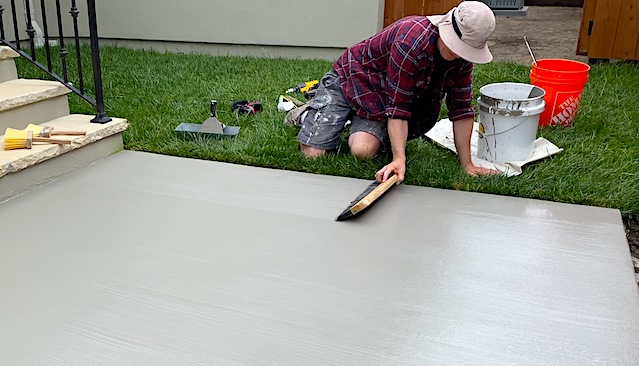
Step 3: Apply the Resurfacer
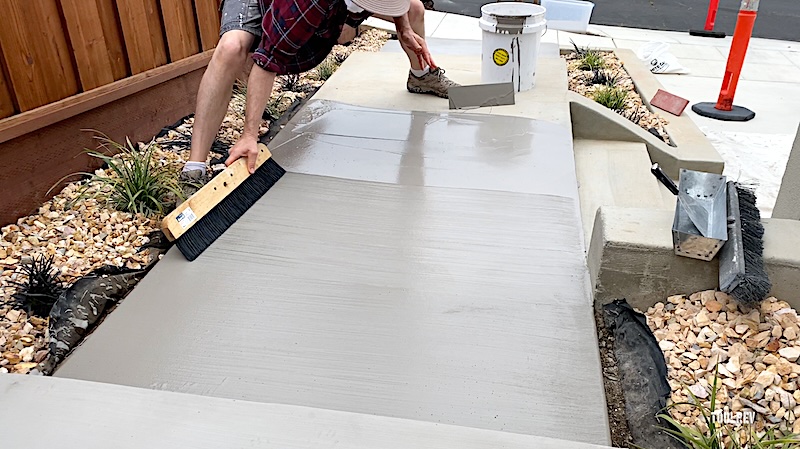
Spread the resurfacer with a trowel or squeegee. I used a metal trowel to “burn” it into the concrete, laying it back slightly thick for an even finish. A rubber squeegee on a pole would’ve saved my back—try it for larger areas.
Aim for as thin a layer as possible while still achieving an even finish.
For step risers and walls, I brushed on the resurfacer, keeping a water bucket at hand to clean brushes. For texture, I added a broom finish, cleaning the broom in a water bin as I went.
Work in the Shade
My project took two days working under clouds or a tent that I moved around to stay out of the sun.
Work Fast
The step landing seen below took 15 minutes to resurface, under clouds in 75 degree whether, and I had maybe 8 minutes to apply a broom finish to the wet sections before they were too dry. So you need to work fast.
Step 4: Finishing and Curing
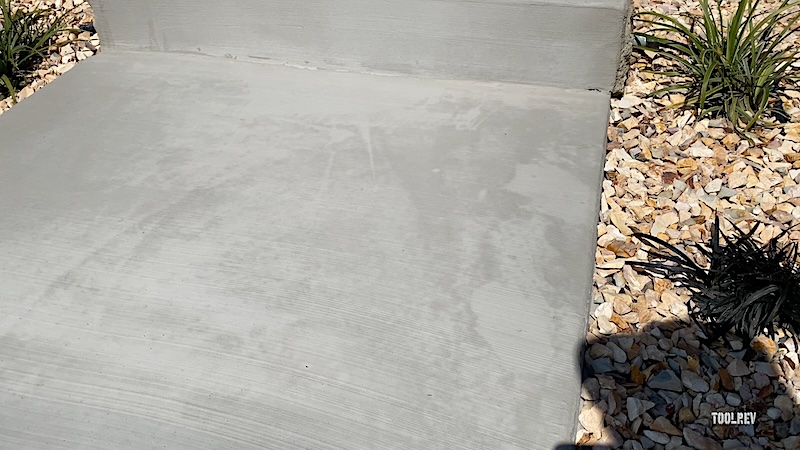
You can walk on the resurfaced concrete in a few hours, but avoid water. Water hit my fully dried steps within 5 hours, leaving permanent streaks. Ardex suggests a 10 minute wet-water-vinegar bath for discolorations, but I didn’t test it on streaks.
A sealer is recommended, and may even be required for warranty, but I skipped the sealer to avoid darkening, and after a year of lawnmower abuse and 2 more pressure washes, the surface still looked new in our mild coastal weather.
Tips for Concrete Resurfacing
- Work fast: Mix small batches and have tools ready for the short working time.
- Choose your finish: Fine finish looks sleek but may show patches; they say regular finish covers better.
- Crack prep: Pretreat cracks to prevent reappearance. Follow manufacturer guidelines.
- Squeegee for ease: Use a squeegee on a pole for large areas to save effort.
- Weather matters: Work under cover and avoid water during curing.
Final Thoughts on Concrete Resurfacing
This two-day project used 4-5 20-pound bags of Ardex CD Fine Finish (about $220-$275). The result? A durable, natural-looking surface that held up to a year of wear and looked great when I sold the house. There are cheaper off-the-shelf brands available, but Ardex or Henry’s seem like solid choices.
This is not hard, but it is physical and requires some innate DIY ability. If you are physically weak or easily panicked, painting may be the better option.
Got a resurfacing project planned? Share your experience in the comments!
Watch the Full Tutorial:
FAQ: Concrete Resurfacing Questions
- How much does concrete resurfacing cost?
- $55 per 20 lb bag for premium like Ardex—4-5 bags for small projects (~$220-275). Saves vs. $5,000+ replacement.
- Can I resurface concrete myself?
- Yes, if DIY-savvy. Takes 1-2 days; physical but straightforward with tools.
- Do I need a pressure washer?
- No, but it helps. If your concrete absorbs water reasonable fast the resurfacer should bond to it well.
- How long does resurfaced concrete last?
- 5-10 years with sealer; mine looked like day one a year later when I sold the house. My parents have it on their covered front patio, it’s been over seven years, and it also looks like day one.
- What if cracks reappear?
- Pretreat with caulk/sand; untreated ones showed in weeks.
- Is Ardex CD better than Henry 625?
- Nearly identical (Ardex owns Henry); choose based on availability.


